
Several months ago I acquired a Gelli Printing Plate. I had previously used the method with regular gelatin, but was thrilled to work with a more durable product than I could produce in my kitchen. Gelli Plate printing is a monoprinting method, and in my opinion gives a slightly different look than using an acrylic plate. You can read more about the original process in these posts from Pink Doxies:

Once I had the hang of working with paint on fabric, and there was definitely a learning curve--read here, Inks and Paints Not Labelled Safe for Fabrics, I started to experiment with stencils, stamps, and anything else I could use to impact the print. As each print was pulled, some remaining paint added to the overall complexity as new paint was then added.

This particular print is my pick to add to this bag made from some salvaged fabric I had printed and then dyed.
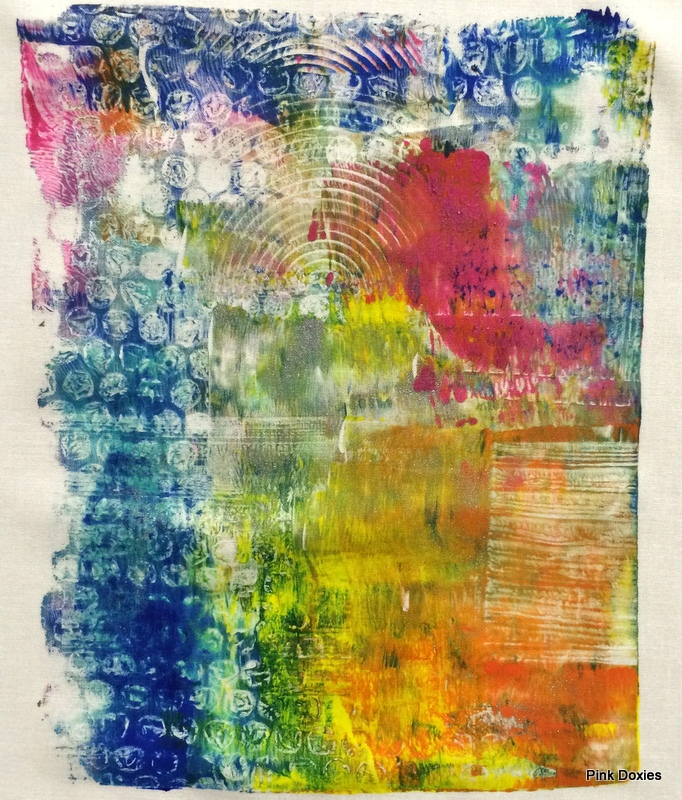
Can you see what tools I used to create the textures?
Bubble wrap, a wood graining tool, a stamp, and some
bunched up plastic wrap all worked well.
Printing onto an absorbent substrate such as fabric means you must increase the amount of paint you lay down before printing. This is interesting because with paper it's much more desirable to use a thin layer, and it took a few tries before I could get it right. Viewing the print above you can see how the edges on the left are impacted while using slightly too little paint. I wouldn't say it's undesirable, but the whole point of experimenting for me is learning how to control the media in my favor. So, this did not do what I intended.

Orientation
Applying paint to the plate is easiest done with a brayer. It provides a fairly even coating on the plate, and this type of printing requires working quickly. You would be very surprised to find how quickly paint dries in a thin layer. Adding an extender or medium like Slo Dri to the paint is helpful, but I find even a fabric medium increases drying time if I use regular acrylic paint. In an emergency, I have a spray bottle of water nearby, and have spritzed over the paint lightly if I find it is getting tacky too quickly.
These prints were pulled a few months ago, but I had no idea what I wanted to do with the extras. When I saw a request from the Ohio SAQA group for pieces to use as a travelling mini art quilt show, I knew I could make one work. How? I was short on time, and this was the perfect size already!

Paint Does Not Recover From Ripping--You Have One Shot!
I set to work trying to see something in the print. Do you do this? Do you turn it this way and that hoping something will show itself? I do. But I find that often it is easier finding an image when it is oriented differently than how I saw it when it was created. In this case, I turned it sideways. There were places I found this skull seemed to pop right out at me.
I had many options for thread color, but I chose a dark violet. This 8" x 10" piece was longarmed, and I will say that is equivalent to driving a jet ski through a baby pool. I worked carefully, and buried threads afterward. To finish the edges, I took the top to the back, and created a faux binding on the backing. I find this method creates a nice edge to the print.

Revealing My Source

Just a Fraction On the Floor of Lunn Studios

Amazing! In the first photo, I saw the quilting lines and wondered what I was looking at and then - bam! There is was - a skull. Had me looking for things in your other works, too. Going to be a snazzy bag, Julie. Look forward to hearing all about your retreat.
ReplyDelete